

Like many other seamstresses out there, I'm mildly terrified of sewing pants for myself. Pants are difficult, not because of construction, but because of fit. This is especially true for me because the measurements for my top and bottom halves are so far apart from each other on the back of any pattern envelope that I'm not sure they even speak the same language. In other words, I am a pear in the extreme. Pants cut for the "average" lady just can't hack it when it comes to my waist:bottom ratio. No fault of mine, I tell you. That's also why I'm determined to one day sew the perfect pair of pants. But it's also why I thought I'd ease myself into it with this cute pattern with the flat waistband in front and the secret elasticized waist in back. Perfect way to accommodate both my waist and hip measurements, right? Well, you'll see...
First, not being a total novice, I decided to alter the pattern a little to fit my bum. Elastic can only do so much, after all. I decided to follow this clever seam method of pattern alteration from Threads magazine:


Above is the unaltered back pattern piece. I only altered the back, because that's where my bum is. Logical, no? If your lower belly needs some room in front though, you could probably replicate this process on the front pattern piece. First step was to draw in the seam allowance lines. Sorry for the poor photos. Then, I cut off those seam allowances and added a little breathing room:

The blue arrows point to the two places where the seam allowance pivots outward to create some extra space. The left arrow is pointing to the inner leg seam. I don't need that to be longer, so it's not spread, just pivoted outward. The right arrow is pointing to the outer leg seam. Again, I don't need extra length there, so it just gets a pivot as well. You can see that the lengths of these seams won't change, which is good because if it did I would have to go and alter the lengths of seams on the front pattern piece to match. The only seam which gets enlarged is the back crotch seam, and since the two back pieces are stitched together along that seam, it doesn't require altering any other pattern pieces. Hope that makes sense. You can see in the photo above that I made two cuts through the seam allowances on the back crotch curve so that I could expand it.
Now how much should you spread the seam allowances to achieve the correct fit? I'm not sure if this is a good method, but it worked okay for me. First I measured my front and back crotch length. Basically, you do one of these with the measuring tape:
 |
| http://aces.nmsu.edu/pubs/_c/c-227.html |
Now you can compare those measurements to your front and back pattern pieces by curving your measuring tape along the crotch seam line of the pattern. When I did this, the front crotch seam was 3 inches shorter than my body measurement. However, since I know my tummy is not causing fit issues, I deduced that this was because the front pattern piece doesn't extend all the way up to the natural waistline the way my measurement does. There's still a waist band to attach, after all, which probably makes up those extra inches. Next I compared the back crotch length to my measurement. It came up about 4 inches short. I decided that 3 of those don't count - again, they're hiding out on the waist band piece. That leaves the pattern piece 1 inch shorter than my back crotch measurement. So when I spread out those seam allowances, I tried to create a total of 1" gap - a little at the top cut and a little at the bottom:

All that's left is to redraw the crotch curve and make this new shape permanent. I laid some more tracing paper under my pattern piece, taped everything down, and drew the lines with a marker, using my French curve for the crotch line. You can also just eyeball it. Here's my new lines:

Cut that sucker out, and it looks like this:

My pattern altered, I proceeded to cut everything and sew it up. This pattern goes together pretty easily. I did flat-felled seams, which are my new favorite, and I added a little length to the bottom so I could fold it up to create cuffs:

Here they are completed, nice and wrinkly from wearing around the house:

Oh, did you want a photo of me wearing them? You want to know if they fit? Well, let's start with the front:

Ta da! Looks alright, right?

I like the soft pleats. I like that they sit at about my natural waist. I love the pockets. I'm glad I added cuffs, but it turns out that they didn't need the extra length. I'm wearing them rolled up again in these photos.

Front is good! The back? Well...
Turning around. Still okay...

Detecting problems. What is that!?

Oh dear.
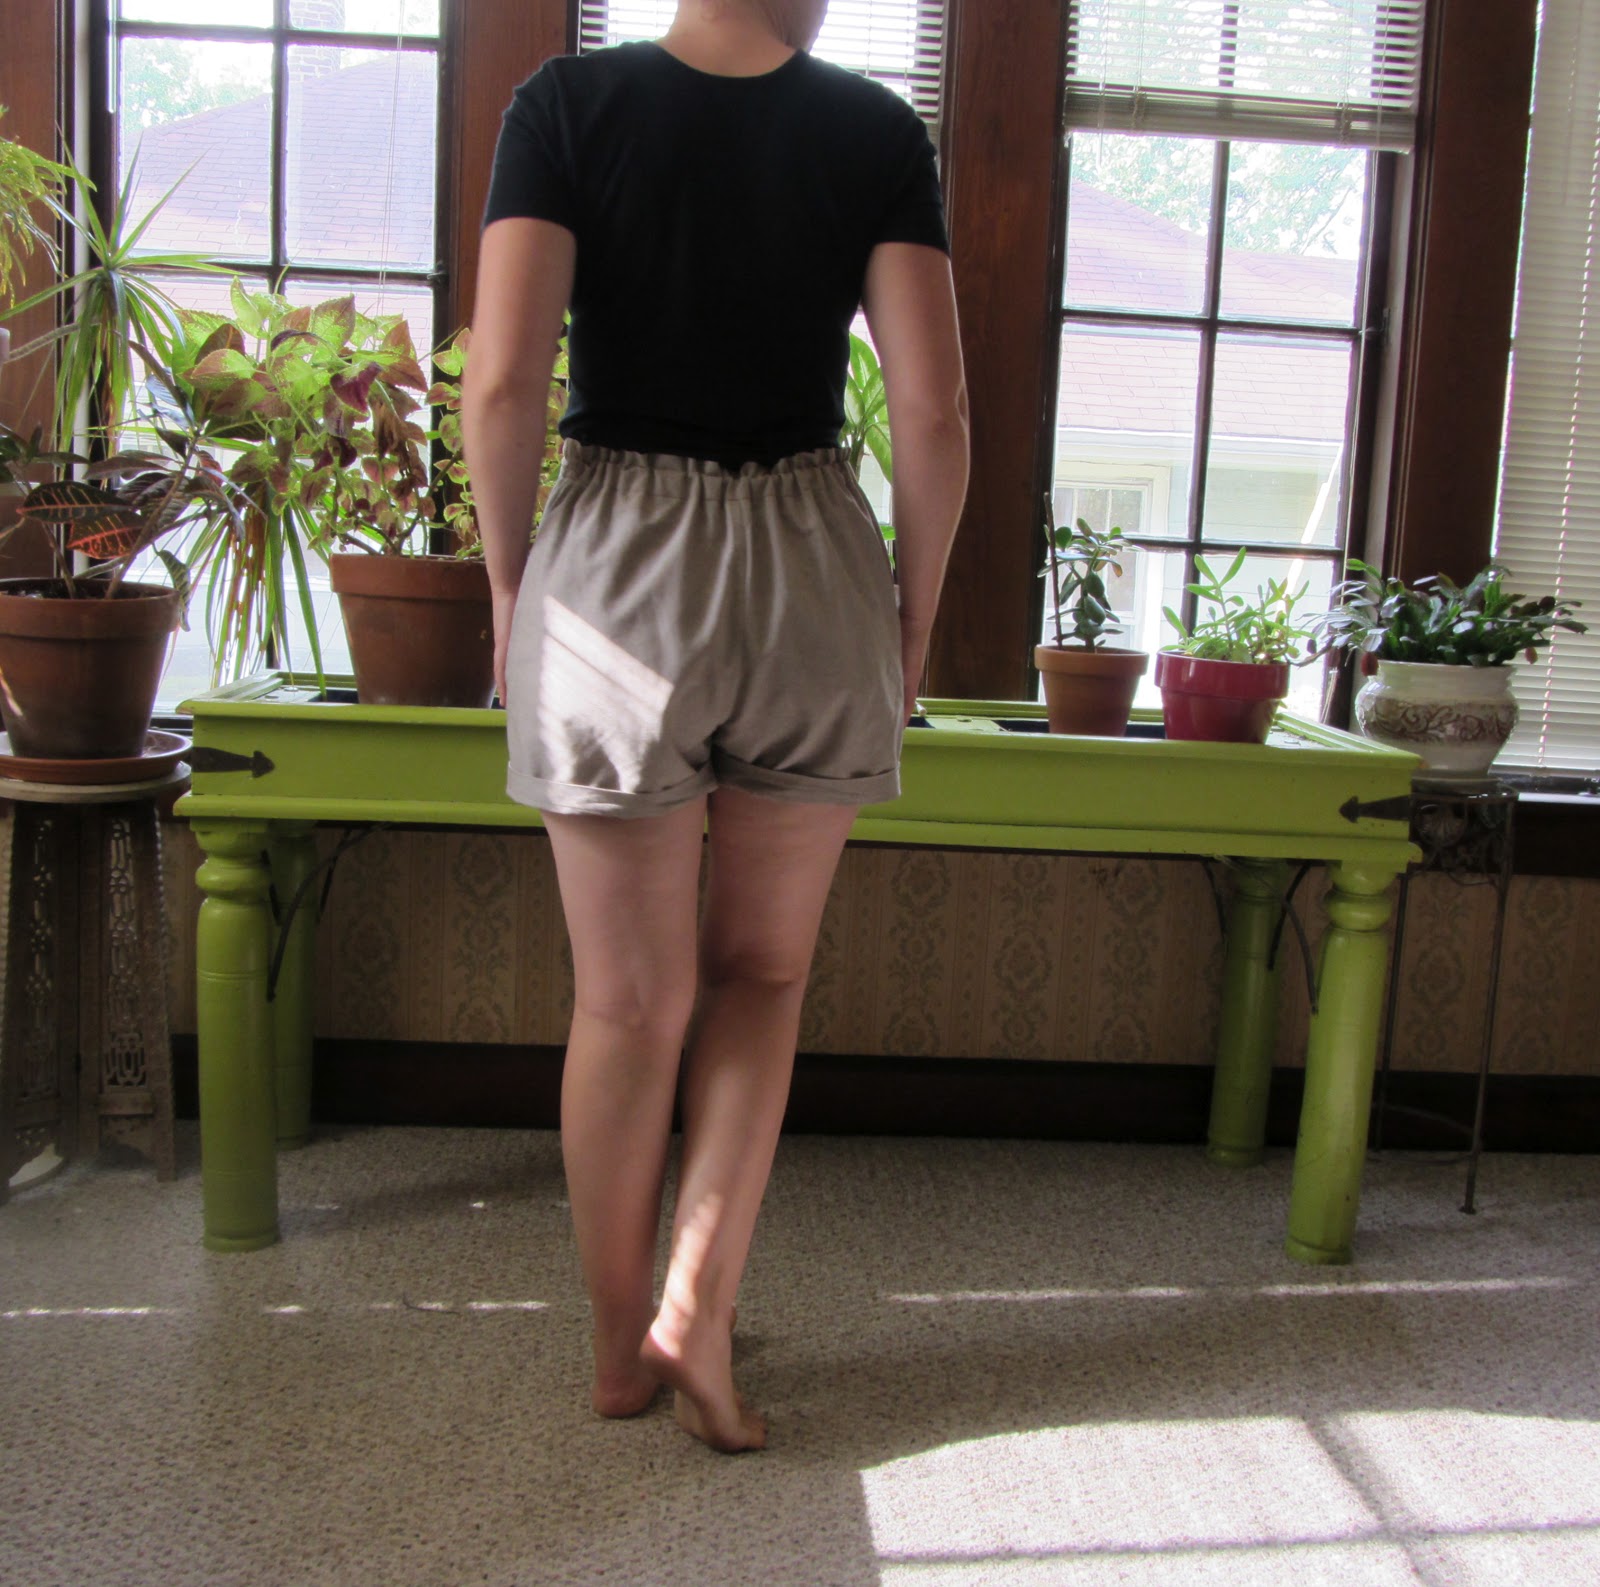
From the rear, these are baggy bloomers or Mom-pants gone wrong. I suppose this could be a style, but I have a feeling that this huge excess of gathered fabric is not what Simplicity had in mind. Now on the bright side, I think the crotch adjustment was the right thing to do - the crotch length on these is just right. The problem is in all the extra width - mostly at the waist but also across the back of the shorts. One problem is that Simplicity includes too much wearing ease. This pattern lists the finished hip measurements, but not the finished waist measurements - probably because you're supposed to adjust as you see fit with your elastic. Unfortunately, pulling my elastic tight to my waist creates the mess you see above.
So, while I thought the elastic waist was a good solution, it turns out this pattern is just not well-suited to pears. Unless you want baggy bloomer bottoms. You'll end up with too much unflattering gathering in back.
I'm not giving up though! I think these can be rescued, but it's going to involve a lot of unpicking my stitching as well as a zipper installation... and some darts. Wish me luck!
I just purchased this pattern and can't wait to try it. Thank you for doing this review and giving me some insight.
ReplyDeleteYou're very welcome
Delete